Create a Listing
This section outlines the step-by-step process for creating a property listing on our app. Ensure you have all necessary information and images of the property ready before you begin.

On your iPhone or Android Phone
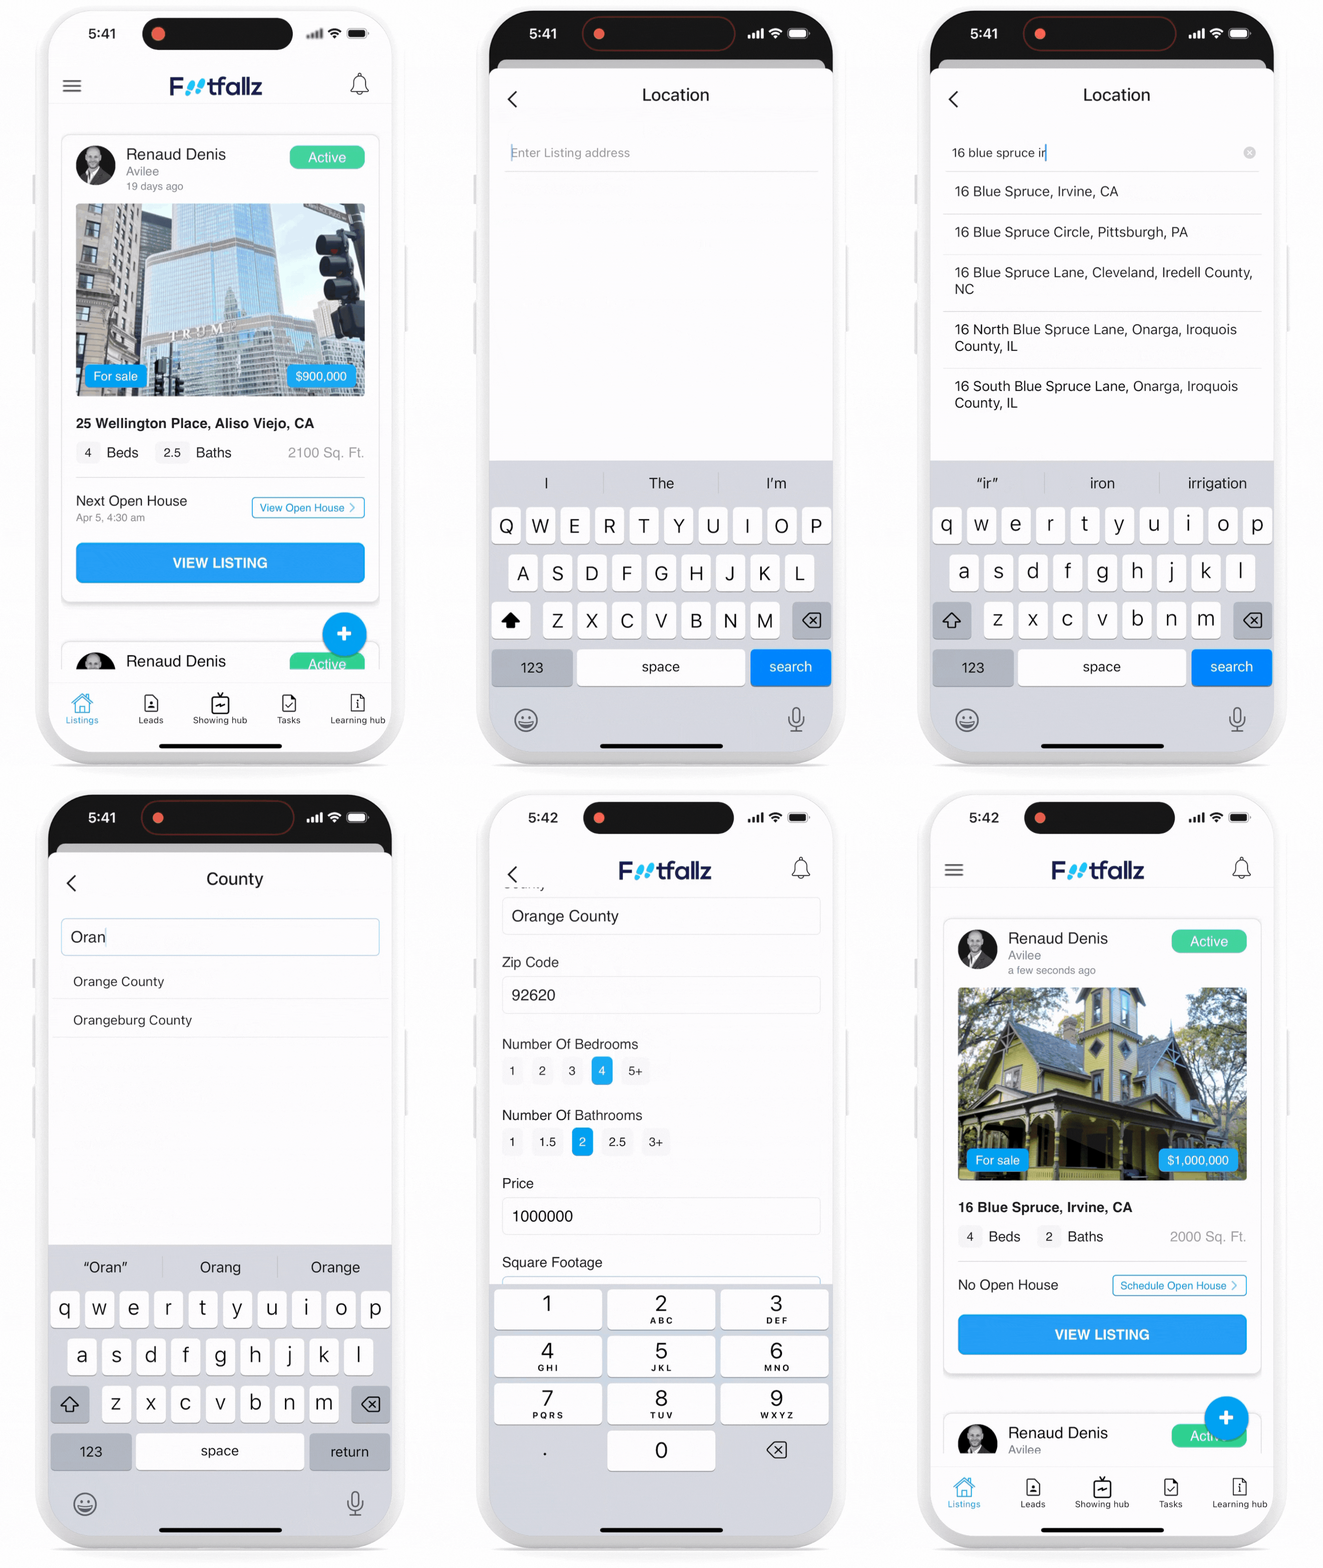
Step 1: Open Create Listing Screen
- Open the app and navigate to the Listings tab.
- Tap the + button located typically at the bottom right corner of the screen to start creating a new listing.
This will open Create Your Listing screen.
Step 2: Create Listing
On Create Your Listing screen, you will need to fill in various details about the property.
- Photograph: Upload a high-quality photograph that best represents the property. This image will be the first impression potential buyers or tenants see, so choose a well-lit, appealing photo.
- Listing Address: Enter the full address of the property. This information is crucial for potential buyers or tenants to locate the property easily.
- Listing Type: Select whether the property is For Sale or For Lease. This helps users filter properties based on their buying or leasing needs.
- City: Input the city where the property is located.
- State: Select the state from the list.
- County: Enter the county where the property is situated.
- Zip Code: Provide the zip code for the property’s location.
- Number of Bedrooms: Enter the total number of bedrooms in the property.
- Number of Bathrooms: Specify how many bathrooms are available in the property.
- Price: Set the asking price for buying or leasing the property.
- Square Footage: Input the total square footage of the property to give potential buyers or tenants an idea of the property’s size.
Step 3: Review and Submit
Before publishing your listing, review all the information. Make sure everything is accurate and presents the property in the best light. Once satisfied, press the CREATE LISTING button.


